Materials:

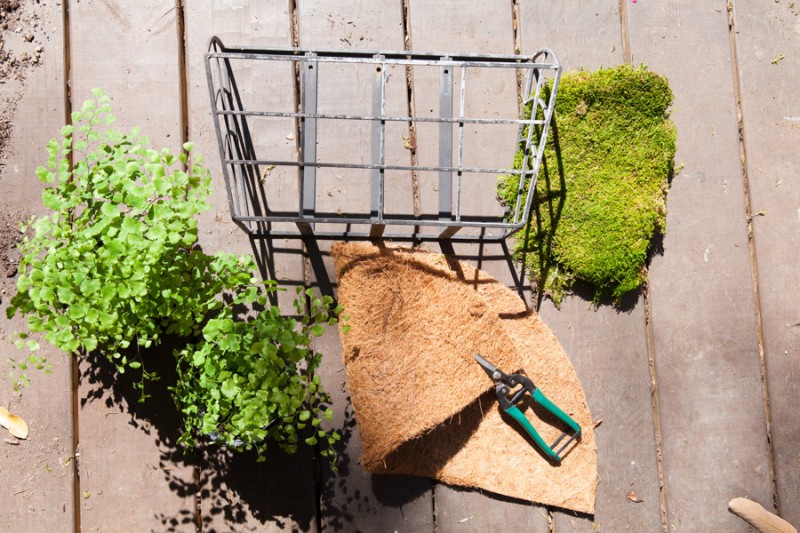
- Assorted baskets, narrow with high sides
- Coconut hanging basket liners
- sheet moss
- scissors
- plants that will thrive in the spot you picked
- Filler for the baskets
Directions:
According to handmademood.com, here is how she did it:
Cut the coconut liner to line the bottom, back and sides of the basket. You might find it easiest to cut slits into the sides where the liner overlaps so that it lays flatter. Trim as needed, but overlap is a-ok.
The next two steps can be flip flopped depending on how you choose to proceed.
I used left over plastic plant pots to fill the bottom of the basket because it’s so deep. If the basket was deeper, I’d use bigger pots. If it was shallower, I might not have needed anything. These containers are flexible and squishable – so I made ‘em fit just right.
Then, using as large of pieces of sheet moss as possible, line the front and sides of the basket with the moss. Fill in the holes as needed. The bigger the basket holes, the larger the pieces of sheet moss need to be so they don’t fall through. The ferns stayed in their pots and were just nestled right on top with the top of the pot below the moss line.
You could also simply line the entire basket with coconut fiber and fill it with soil. Then you would just plant the plants in there.
Now you would affix them to your outdoor wall and enjoy the beauty you created!
These planters are so charming. Please send us your pics if you do this tutorial and tell us about your favorite creative ways to turn plants into art!
Thank you to handmademood for this great tutorial! See her site for more pics!
featured image from flickr


No comments yet... Be the first to leave a reply!